


How to Use the Security Governance Workspace in Dynamics 365 for License Monitoring and Validation
Get ready for license validation changes coming January 15 2026
Using the Security governance workspace to audit your roles in Dynamics 365 can help you save money on licensing costs. Microsoft will begin validating users' licenses on January 15, 2026. This guide walks you through how to use the Security governance tool to clean up roles by creating custom duties, adjusting permissions, publishing changes, and tailoring security roles to fit user needs while keeping license costs down.
Table of Contents
1. License Usage Summary
The User license summary page in the Security governance workspace shows how roles and permissions drive license requirements in Dynamics 365 Finance & Operations.
Microsoft Learn reference: User security governance license usage summary - Finance & Operations | Dynamics 365 | Microsoft Learn
Steps:
- Go to System Administration > Security governance > License Usage Summary.
- Under the Duty licenses fast tab, filter for view-only duties that may be triggering higher license requirements.
- Use the filters to identify any “Not Entitled” privileges for the selected license.
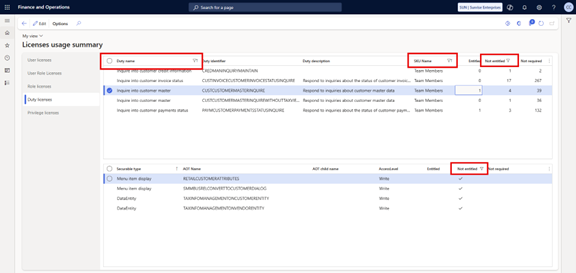
Under the Duty licenses fast tab, filter for view-only duties that may be triggering higher license requirements.
2. Security Categories and Process Hierarchy
Categories are used in the Process roles maintain module to organize roles by department or workstream. Setting up categories correctly reduces development costs when future security upgrades are needed.
Set up security categories - Finance & Operations | Dynamics 365 | Microsoft Learn
There are two ways to create a category:
- Create a new category from scratch.
- Import an existing category from another company.
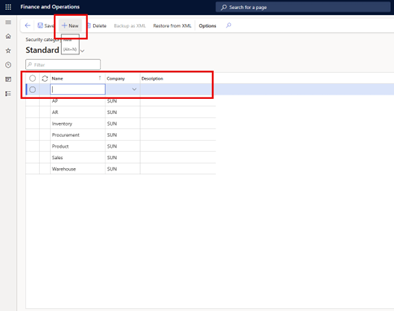
- Go to System administration > Security governance > Security category.
- Select New.
- Set the Name field.
An alternative way to create security categories is captured in the screenshots below:
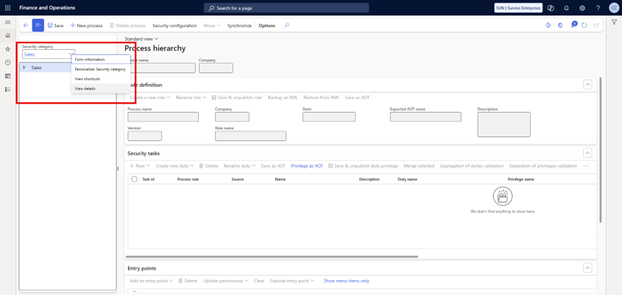
2.1 Process Hierarchy
A process hierarchy organizes and manages business processes by linking tasks, roles, entry points, and privileges. It allows roles to be built around position-based responsibilities, ensuring that access is aligned with the organization’s structure.
As a high-level guide, you can think of the areas in the Security process roles maintain form (also known as the Process hierarchy form) as follows:
- Security category: Groups that represent a division, department, or workstream.
- Process name: Each process results in a security Role.
- Security task: Each task results in a security Duty and Privilege.
- Entry points: The most detailed level where security is defined. This level matters because it is where you control read versus write access.
This approach makes roles easier to understand and define, while also improving UI effectiveness, controlling license costs, and reducing risk of data fraud.
- Go to System administration > Security > Security governance > Security process role maintain.
- In the Security category field, select a category, and then select the desired tree level within that category.
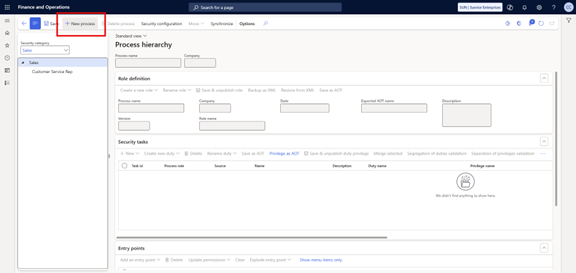
- On the Action Pane, select New process.
- In the Process name field, enter a unique name for the process.
- Specify other details, such as a description and version information.
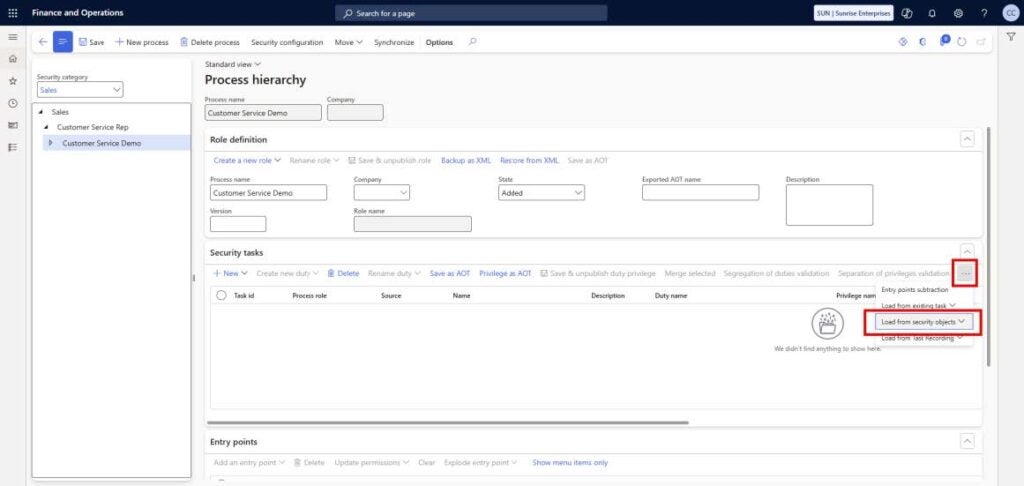
2.2 Load Entry Points from Security Objects
There are multiple ways to populate a new task, including creation from task existing tasks, security objects (user ID, roles, duties, privileges), or task recordings.
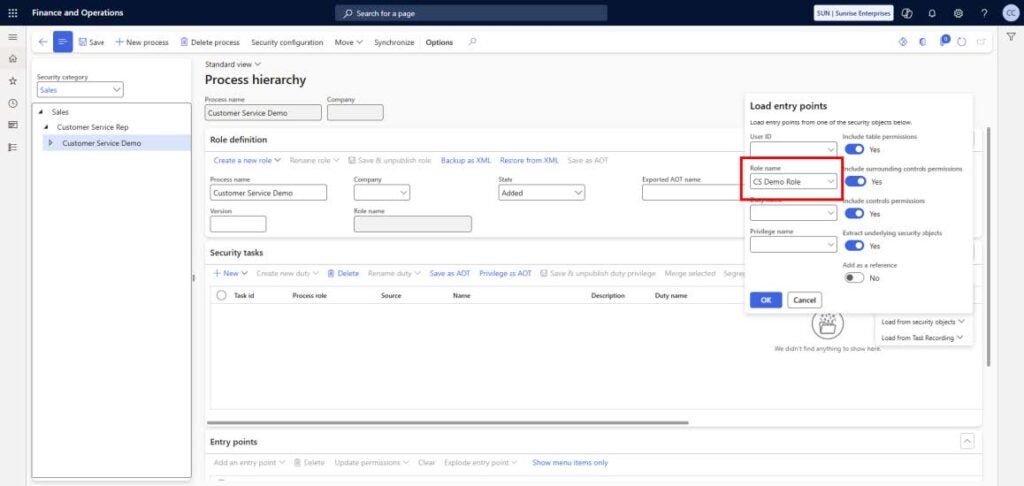
In this scenario, we want to make sure an existing role is fully read-only. To do this, we’ll import entry points from another role. This can be a role currently in use or an out-of-the-box role.
Steps:
- Choose the source role (in-use or out-of-the-box).
- For this example, we’ll select the CS Demo Role, which has two out-of-the-box duties assigned.
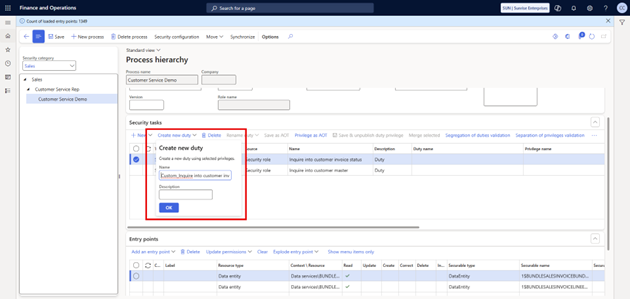
2.3 Create New Duties
Out-of-the-box duties should not be edited, since they may be shared across multiple roles. Instead, create custom duties for this specific use case.
Steps:
- Select a security task record and copy its name.
- Create a new duty using a format such as: Custom_[DutyName].
- Repeat this process for each duty required.
- Keep the naming convention consistent for clarity.
Note: When you click OK to create a duty, it is immediately published into the system. If you are working in production, remember that these changes take effect right away.
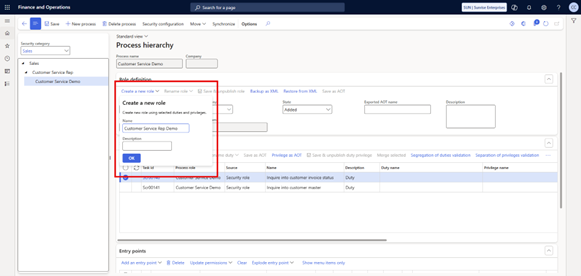
2.4 Create a New Role
After creating the custom duties, the next step is to set up a new role.
Steps:
- Within the Role Definition fasttab, select Create new role.
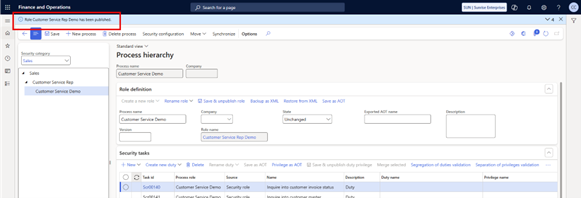
- Enter a role name (for example, Customer Service Rep Demo).
- Once created, the system will confirm that the role has been published.
At this stage, the new role will look the same as the role it was based on since the duties and privileges themselves haven’t yet been modified.
2.5 Ensure New Duties are Referenced on the New Role
After publishing the new role, confirm that the custom duties are correctly assigned.
Steps:
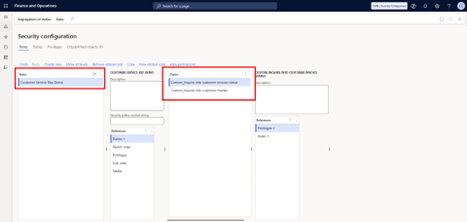
- Go to System Administration > Security > Security configuration.
- Filter for your custom role.
- Highlight the duties to verify that the custom duties you created are referenced on the role.
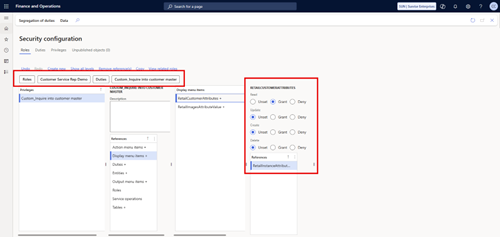
2.6 Update Permissions
After confirming that we’re working only with custom duties (and not editing the out-of-the-box ones), the next step is to change their entry points to read-only.
- Select the first duty.
- Review the entry points. Some may be set to Update, Create, Correct, or Delete. These actions cause higher license requirements.
- Select all entry points and choose Update permissions.
- Change the settings to Unset, except for Read, which should remain granted.
- Click OK.
- Repeat for remaining duties
Result: all entry points for this duty are now read-only, with no update, create, correct, or delete access.

2.7 Save as an Unpublished Duty Privilege
Once the permissions are updated, the next step is to save the duty privileges as unpublished.
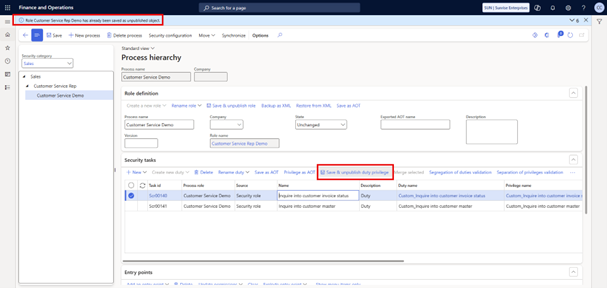
There’s a small quirk in the system here: the button is labeled “Save & unpublish duty privilege,” but what it really does is save the duty and privilege as unpublished.
For each duty:
- Select the duty and click Save & unpublish duty privilege (again, should say “Save as unpublished duty & privilege”)
- Confirm that it was saved as an unpublished object.
- Move to the next duty and repeat the same step.
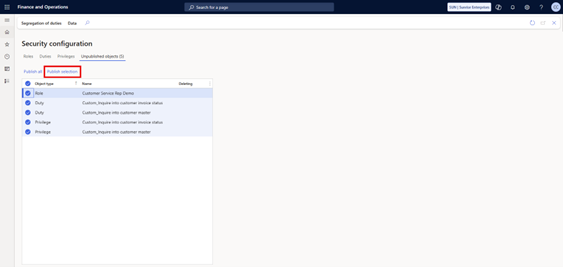
2.8 Publish Role, Duties, and Privileges
Next, go to Security Configuration to publish the changes.
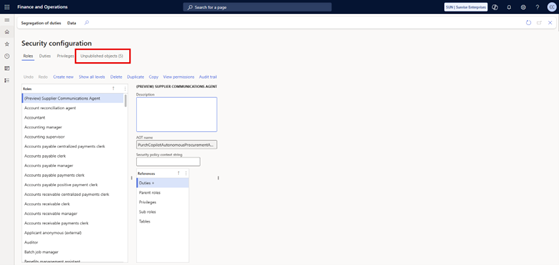
- Go to System administration > Security > Security configuration
- Refresh the page to load the latest objects.
- You should see the unpublished items listed (for example, the new role, duties, and privileges you just created).
- Select the desired unpublished objects.
- Click Publish and confirm with Yes.
2.9 Verify Results
Once the objects are published, you can verify the results.
- Go to Roles and search for the custom role (for example, Customer Service Rep Demo).
- Open the role to confirm that the custom duties are assigned.
- Drill down into the privileges. What previously required Write access (such as retail customer attributes) should now be set to Read-only.
3. License Usage Summary Update
After publishing, return to the License Usage Summary screen.
- The report will update within 2–8 hours.
- Once refreshed, you should see the two custom duties you created.
- The “Not Entitled” actions will no longer appear. Many will now show as “Not Required,” meaning they do not trigger a higher-tier license.
- In this case, the duties should fall under the Team Member license level.
Get Organized about Dynamics 365 Licensing
Speak with a Microsoft Dynamics 365 licensing expert today. Reach out to us for a free license mapping assessment: we'll help you identify potential cost savings and how you can optimize your Dynamics 365 licenses.